Monday, May 30, 2016

Cookie Table Party Favors

Cookies made by the bride's family are a tradition in some Italian families. When my part-Italian daughter married her part-Italian groom, I knew I wanted to ask my mostly-Italian family to bake cookies. They agreed and our cookie table was a hit.

I began collecting glass platters from thrift stores until I had enough. Little berry baskets lined with tissue were the perfect way for each guest to select their cookies to take home. You can find the berry baskets here in several sizes. Happened to have a lot of cream and brown zebra tissue left over from my retail shop - and with a bohemian style wedding, it fit right in.  I also cut little square sheets of tan tissue for guests to grab their cookies with and to put on top of the basket (like a lid.)


The cookie table being set-up on wedding day
You can guess, if you have read my other wedding posts, that I do not have a photo of the cookie table with the cookies!


A small berry basket, lined with tissue, for taking cookies home

Wedding Supplies, Mostly Thrifted


For my daughter's wedding I had about twelve weeks, and a limited budget, to create a beautiful "wedding to remember" and be proud of. It was going to be hand-crafted and I even made her wedding dress. We would be doing everything and purchasing all supplies ourselves, except for renting a few items like tables and chairs. 

I started visiting thrift shops weekly, from Los Angeles to San Diego, for the stuff I wanted. First, it was important to have the plan and know what I was looking for. I decided to collect white coffee cups, flatware, white and cream napkins, tablecloths, punch bowls (to use as salad bowls,) barware, small bottles (to use for vases,) glass carafes (for water,) white plates and clear glass candlesticks (to create pedestals for the cakes,) cookie plates and so on. The hunt was very fun, since I love thrift shopping, and sometimes I had company which made it even more productive since I had extra eyes to find the goods.

This was very labor intensive and I would not recommend doing it if you do
not have help. Not only did I have to wash everything once when it came home from the thrifts, but then again after the wedding. The flatware was the worst, as you can imagine. Especially since I let the pieces sit in a bucket of water for days and days!

We purchased new metal trash cans with lids to use to transport the items, and to use for trash cans at the wedding, and then to store everything again afterwards. 


The bride and groom's table. I found the pretty flower-shaped green plates, bowls, glasses and napkins just for their table. They used family heirloom gold-plated flatware.


The overview of the table set-up. Two long tables stretch the length of the green belt, with two smaller tables for the wedding party and their guests. The bride and groom have their own table complete with hand-crafted letters on their chairs and a vintage bed spread used as a table cover. The guest chairs were used for the ceremony and then carried over to the tables.


We made the pedestals with different sized white plates glued (not just plain glue) onto clear glass candlesticks. They have been so great to have around (I think I made fourteen of them!) and only one has broken in a couple of years. Use an epoxy and be sure your plate has a flat bottom and the candlesticks have a nice flat top that will be substantial enough to hold the plate. The key is finding the center point on the plate and then placing the candlestick centered over it - draw around the candlestick and place the glue there. Let dry overnight. I found several domes that came with cheese boards (which we used for the cheese and fruit spread) and love to use them in the kitchen when I bake.


The cakes on their pedestals. We decided to have 7 different cakes rather than one big wedding cake. The couple cut the "Mother Lode" cake from Claim Jumper.


The beakers were used for the water ceremony. I collected several and only used three.


I love little bottles. Some of these were vases, some were oil and vinegar carafes, but most were little bottles. All collected while thrifting. I used them all over the tables with flowers and fresh sprigs of herbs.


Gerbera's and herbs in the little jars. We also had small jelly jars of jelly beans for guests to take home. The runner is vintage 60s wallpaper was stashed in grandma's attic (I remember it hanging in her bathroom.) I cut it into long, narrow pieces to use down the center of the tables.

Carafes and bottles were placed on the tables filled with water. We also had additional water available with a ceramic container and water stand, where water bottles could be refilled if need be. The wedding and reception was in an open green space and we needed a source for fresh drinking water.  
We served salad in large punch bowls with tongs (which I purchased new at a restaurant supply house) - it was tossed and passed down the long tables, family style. We had breadsticks in jars on the table. They are nice for adding some height.


The punch bowls came with cups that I didn't really plan to use. Then I realized they would be perfect to hold the votive candles. We used unscented soy votives and they melt, so the cups were a great option. We also used the punch cups for salt on the tables. Pepper grinders were also placed with each salt cup.


Sometimes when you go looking for something, you get lucky. And I was very lucky to keep finding enough (150) clean white and cream linen napkins. I mix and matched them on the tables. They were ready to go with the flatware inside, and tied with green paper ribbon. Which we did on my crafting day with family and friends a few weeks before the wedding.

The glasses I selected were not too delicate and on the short side. Tall glasses mean the beverages will be gone faster! These were for lemonade and sangria. Ice cold beer and soda were available in bottles.

White coffee mugs are in great supply in thrift stores and I had no problem finding enough in time for the wedding. I selected large cups or mugs that didn't need a saucer.


We stacked them up on the hot beverage bar. Instead of preparing coffee, we had several large urns with hot water. Coffee (Starbucks Via packets), tea bags, and hot cocoa were sure available.


One of the items I purchased new were shot glasses from IKEA. At the price they sell for there, it was not worth the hunt at the last minute to find enough thrifting. We decided to add cold soup shots as an appetizer with just a few weeks to go. I love these and we use them a lot for different things. Dip with carrot / celery sticks - and milk shots with cookies were two recent party uses.


A menu was placed at each setting. It's nice to know what the evening holds when you are hungry after traveling and the ceremony!


Thursday, April 7, 2016

Time for the Avocado to Shine

CRAFT pop up Workshops would like to share our love for the avocado with a few tidbits of how life in Fallbrook can revolve around the green fruit growing in so many groves in the area.


This is the "Avocado Capital" of the world (it says so on google!) and our town hosts a popular Avocado Festival each spring. This year the 30th annual Fallbrook Avocado Festival is Sunday, April 17th from 9 am - 5 pm. It runs along Main Avenue in the downtown section of town.

Found this poster on the Chamber page


Denise from CRAFT and Vintage Sister Studio  has participated in years past along the artisan walk on alvarado part of the festival. Her Avocado Earrings (above) were a popular item to show the avo love. She's not doing the festival this year, but she does have a few pairs of earrings available. Contact her if interested and to see several styles she has. They are $18.00 a pair.

Karen, also from CRAFT, is an artist and card designer. Her work can be seen at  Ransom Notes by Karen Walkup.  One of her pieces (below) is a perfect quote for life in Fallbrook, "life here is good"


My property has four avocado trees and when they are in season we eat them almost every day. Besides making lots of guacamole, a favorite way we like them is for breakfast. Simply spread on toasted sourdough bread, with sliced tomatoes and a sprinkle of sea salt. 


I wrote a family history and cookbook a few years ago called Rossipes. And, although it is not difficult to find a good guacamole recipe in this neck-of-the-woods, the one created by my daughter Tracy for the book is especially good!


Her shortcut for great guacamole is to use a good (restaurant quality) prepared salsa from the grocery store, and lots of cilantro and freshly-squeezed lemon juice.


Fallbrook Guacamole
For a party-sized bowl of guacamole mix together:
5 large avocados, mashed
juice from two fresh lemons
1/3 cup chopped fresh cilantro
1/2 cup of your favorite fresh salsa
salt and pepper to taste

Keep in refrigerator with a piece of plastic wrap pressed down on top of the guacamole to prevent discoloration. Enjoy!

Ad for 1970s appliances in avocado green

When I lived in San Clemente (in the 70s) I remember my mother loved her avocado green fridge and stove - and we even had avocado green shag carpet to go with it. Those were the days! During my time as an interior designer, I may have used avocado green once or twice - although I am sure they changed the name. Currently I have a little bottle of craft paint and noticed everyone loves to use it - yesterday I checked the name to purchase more. What was it called you ask? Why "avocado green" of course! Everything old is new again.

Wednesday, March 23, 2016

All about CRAFT


Hello, It's me, (oh wait I'm not Adele!) but it has been a long time since I've written a blog so I might be a bit rusty! Well in all honesty, I was always a bit rusty with my blog writing. Never did plan on writing a daily or even a weekly blog, just wanted to write now and then. So here I am a few years later with a new adventure to talk about. After finally admitting to myself (and others) that I was really retired from my design business of 25+ years, I wasn't sure what the future held for me, creatively speaking. 

And, then it happened. Something new, fun, and creative sprung-up out of nowhere one night when I gathered with some friends to craft. Well, "nowhere" was years in the making. Here is the back story.

At Home on Main Street was my retail home/gift store on Main in downtown Fallbrook (in business from 2003-2009.) I loved the shop and the years I was on Main Street.  If it looks slightly familiar it is now the Fallbrook Brewery!
The storefront  
I was very interested in showcasing the work of local artisans in the shop. I wanted handcrafted and beautiful things. Two local artisans, Karen Walkup and Denise Haynes-Port, had their items in my shop - and they also became my friends.

One day Karen came into the shop to show me her original photographs of Italy (Picture Italy) and explained to me how she was printing them on thick foam core - and on big canvas pieces. I fell in love with her work immediately and wanted a collection in the shop.  She's talented in so many ways and soon went on to create a watercolor/mixed-media card group called Ransom Notes by Karen Walkup. I also carried her card creations in the shop.
One of Karen's many Ransom Notes cards
In her newest line (below) you can select hand-drawn cards with original art to color with pencils, markers or watercolor. Karen spent much of her time working with alzheimer's patients who loved having a creative outlet for a few hours in their day. After years of helping others, Karen is ready to have some fun with her art and engage with friends more often.


Denise with her hand-twisted bubble wand!

At the same time Denise Haynes-Port was a duo with her sister (Lori) and together their line of LilyGirl Jewelry was a hit all over San Diego and beyond. It was a popular item in my shop as well. In fact, when I started At Home on Main Street my focus was on home accessories, furniture, and art. By the time I had closed the best selling items were clothing and jewelry! Denise went on to create her own line, selling at craft fairs, and hosting workshops in her VintageSister Studio. She can twist and wrap wire like no other!
Bloom Vases by Vintage Sister Studio
After I closed the shop . . . when the three of us would get together, the conversation always came around to crafting and art and "How could we do something together?" We were all making stuff (I had kept working on SewEcoChic, a line I started in the shop.)  Lots of ideas were discussed. Should we sell our wares together? Perhaps in a booth at a traveling craft show, or by starting a hometown craft fair (all three of us helped start the Village Artisan Faire here in town) and even "What about opening a co-op place so others could craft together?" You get the idea. 

Lulu (below) wearing a Sew Eco Chic hair accessory


Olive (above) is wearing a Sew Eco Chic crown

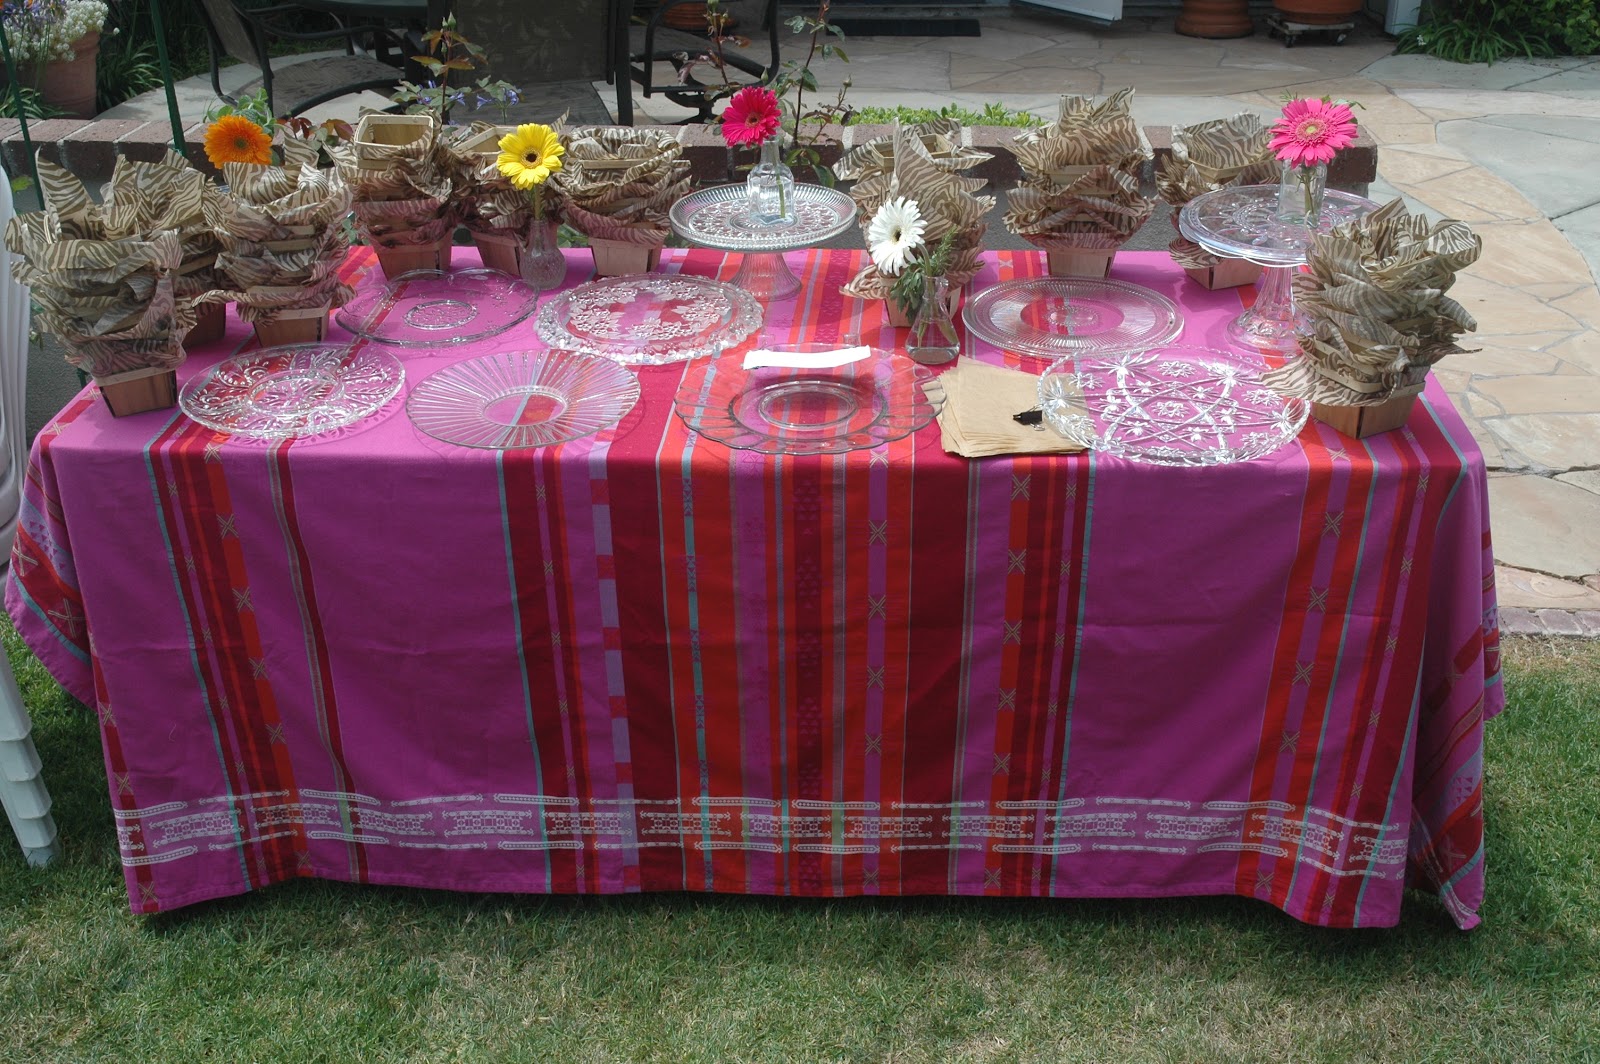
Back to the craft night I mentioned in the beginning . . . the three of us were in Denise's studio because she'd invited friends over to make Valentine's! We decided then and there to work spend time together and share our talents with others in an environment meant to be relaxing, stress-free, and above all FUN! 

CRAFT-pop-up-Workshops unique approach is to create workshops showcasing our talents in art, jewelry, sewing - and in many other crafts we'll develop. We will typically show three projects that are easily doable in one 3-hour session. Each of us creates something to go with the theme of that workshop. Our ideas are endless and we hope to be doing this for years and years to come!

The "pop up" in our name is because we do not have just one place we will be crafting. Our goal is to partner with others to bring these workshops to you in very affordable ways. We each have home studios and will host workshops now and then, but we like getting out in the community to meet and mingle the most. 


Marie, Denise, Karen at The Vineyard 1924
You'll find us coming up at Ranch Of The Rhinestone Gypsies and Myrtle Creek Botanical Gardens and Nursery in April  . . . and in true fashion, you will see us popping-up all over town for complimentary coloring sessions (like we did a few Saturday's ago at Button and Burlap (below) and last Saturday at The Vineyard 1924 (above).


Check our Facebook EVENTS page CRAFT pop up Workshops Events to see when our workshops are scheduled and what we'll be creating. And you can follow us on Instagram too!