Showing posts with label Sew Eco Chic. Show all posts

Monday, April 8, 2013

Mimi & Moo

With the headbands I showed in the last post and these new skirts, sundresses, and bandanas, I think we may be ready to open our Etsy shop. Just waiting to do a logo now - and take the time to actually work on creating the shop. Have already had several inquiries about the items. Everything is made mainly from recycled materials, vintage items, and handmade crochet.

Here's Olive in the orange grove and around the property modeling some of the items:


Our version of a cute toddler bandana - 
there is only one like this.


 Skirts with their coordinating headbands - 
each is unique and one-of-a-kind.


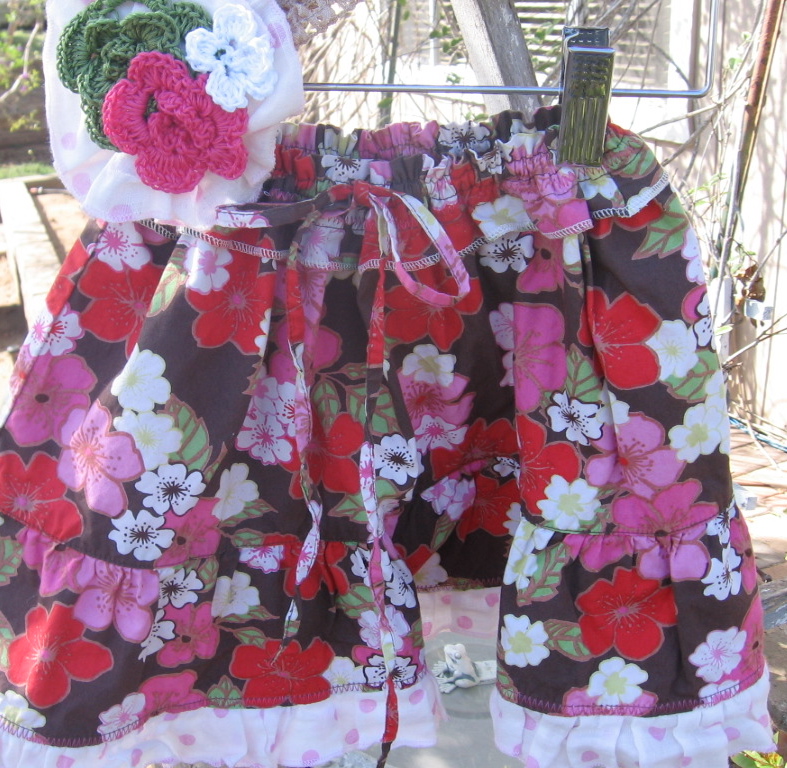
A toddler skirt with an elastic waistband, 
eyelet trim, and flounce.


 The coordinating headband.


 Olive on the move - 
the backside!


Sundress & Headband created from a "found" piece of clothing - 
with vintage lace, trim, and details.


 Olive in the new sundress.


Wednesday, March 20, 2013

Coming Soon . . .

For years now my cousin Joanne and I have wanted to do something together. We've both owned retail stores, love to thrift shop, and we both sew and craft - and now we find ourselves with time on our hands to devote to doing something we love (besides being with our granddaughters!)

We've been busy making items - and like the name "Mimi and Moo" for our ventures. I'm Mimi (my little granddaughter Olive recently out-of-the-blue decided that is what she would call me) and Joanne is Moo (a name her kids have called her for years.) And now that she is a grandmother, it fits perfectly. We'll combine our talents for sewing and crocheting (along with our love of thrift shopping and hunting through vintage markets) to make adorable wearables for infants and toddlers. 

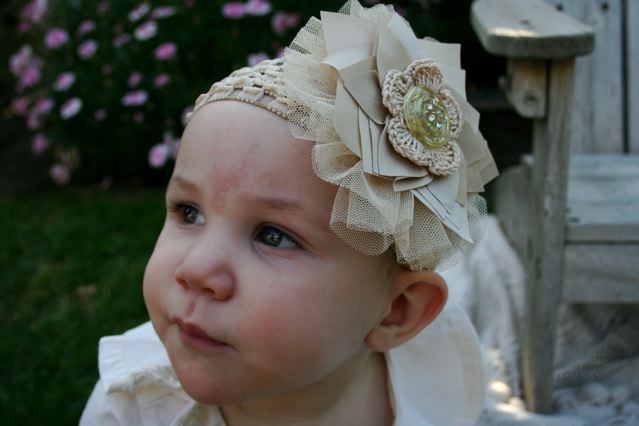
Moo's granddaughter Lily is wearing one of our first combined efforts. A flower made from ribbon (that we made out of a pair of capri pants)  and a crocheted flower. Lily's mommy, Lindsey,  made it into a headband and took this adorable photo.  We also embellished her overalls with vintage lace.
Headbands made with a collection of ribbon flowers, vintage pearl beads and other adornments.
Lily (now older) models several of these headbands in the photos below.
These photos of Lily were taken by her talented mother, Lindsey - an artist and photographer.
 Here's Lily looking adorable in a soft headband made with a ribbon flower and embellished with vintage pearl beads.

A pretty multi-colored ribbon rose on a cream headband.
An over-the-top ribbon rose with vintage beads looks so pretty on Lily!


 A coordinating denim skirt with vintage lace - and a headband that is embellished with a
vintage earring flower in the center that belonged to Lily's great-grandmother.

Another find we discovered when going through a box of treasures that belonged to 
Moo's mother (Lily's great-grandmother) was this red knit flower adorned with sequins. 
It was a pin and now it is part of a very chic red, white, and blue headband.

Lily is so cute in this big floral headband made with a flower (from our hand-crafted ribbon,)
 vintage lace, a crocheted flower  -  and topped off with a vintage button.

The two headbands above are made from vintage yo-yo's and other embellishments.

A fun headband made from reconstructing silk gerbera daisy's and adding a vintage fabric yo-yo.

One of the skirt / headband combos. Skirt has eyelet trim and headband is big and fun. 
She's ready for the 4th of July in this outfit.

 This combination includes a crocheted flower and another vintage find (a button) from great-grandma's treasure box.

My granddaughter Lulu in a cute crocheted hat made by Moo. I love the colors.
These two outfits for toddlers (above and below) are skirt / headband combos made with
up-cycled clothing items from thrift stores, combined with vintage lace, buttons, and crocheted flowers.


Lulu wearing an upcycled skirt made from a ladies shirt and vintage lace

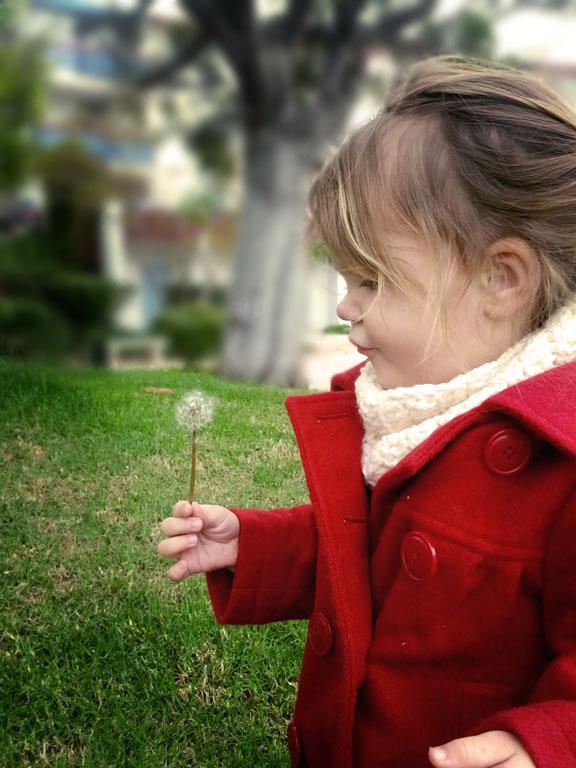
And since I have not been able to take any photos of my granddaughter Olive wearing our new fashions yet, here is one (above) I'll share that shows her wearing a circle scarf crocheted by her mommy (my daughter, Tracy.) Tracy already has her own Etsy shop set up and you can visit her facebook page (Ollie g) to see more of what she is up to.

Mimi and Moo can stay very busy with this and there is no telling where it may lead. We both have a lot of talent in our families - artists, photographers, and architects.  Perhaps there is no limit to our creative dreams. Starting with an Etsy shop (once we have enough inventory) - we'll go from there - perhaps doing a pop-up shop or two during the next holiday season. 

                                            Stay tuned!!

Friday, March 1, 2013

Apron for a Friend

I was having breakfast with a good friend, when the topic of aprons came up. She asked if I could make her an apron, and began to describe what she wanted: "simple front and back with ties on the side." I knew just what she wanted and mentioned that it was already made! I had one perfect for her  and delivered it today. I'd like to see a photo of her working with it on. . . 


Front and Back of the apron. Made from a girls thrift store denim jumper and men's dress shirts.

Side View of apron. 

I used several plaid shirts to make pockets on the front and on back.

 I made the ties from the front of the shirts. 

It would be great to get back to making lots of aprons again. There was a time a few years ago when I was making at least one a day. I think a series of Mommy & Me aprons are in my future. And, not one to leave the boys out - perhaps a Daddy & Me group as well. 
Those would be great for Father's Day gifts!! 

Thursday, February 21, 2013

Sewing The Bridal Headpiece

The wait is over (and it was worth the wait) for receiving the professional photographs of the early December wedding of  Mike & Lindsey. John Robert Woods did an amazing job shooting the wedding and now I have a lot of new blog material to cover.

The beautiful bride wearing her custom made headpiece
John Robert Woods Photography
I'm starting with one of the last DIY projects we worked on. We created the bride's headpiece and the maid-of-honor's sash just two nights before the wedding. 
The bride's gown had many beautiful flowers made from silk.
John Robert Woods Photography
When we saw the sash below at Jinnys Bridal Center we knew we wanted to use it somehow. The first time they brought it out was to show the maid-of-honor who had brought her dress to try on while the bride was in her gown. It looked amazing with her dress. The bride really liked it too, but her dress had enough details with all of the beautiful flowers. On the next visit to the bridal shop, they brought it out again for us to see. This time the bride was interested again - she wanted to wear it in her hair.  It had too much going on for a headpiece alone, and we decided it could serve double-duty as a sash for the maid-of-honor, with the largest flower removed to use for the bridal headpiece.

The photo we snapped of the sash to "think about it."
We couldn't forget it and the bride purchased it on her next visit.
Here's a photo from the Enzoani website. It's called the Diana Belt.
The sash ribbon is the same color in this pic, but some of the other details may
have a slightly different color way.
The bride ordered black "birdcage" netting online for her headpiece and she had a long black satin ribbon. We went to work.

John Robert Woods Photography
This was an expensive sash, so I was a little worried to begin to  tear  take it apart. But I did, very gently, remove the largest flower and some of the extra silk fabric from the sash. I stitched it onto the black ribbon, along with the netting, and after a few adjustments we had a gorgeous and very unique, one-of-a-kind headpiece.

John Robert Woods Photography
One day while shopping for wedding items, the bride's mother and I found a big rust colored flower pin at a consignment shop in Fallbrook and thought it might work for the sash. I bought the stones for the middle of the flower at the craft store. A few stitches later and the sash was reborn into another unique one-of-a-kind accessory.

The sash really turned a beautiful dress into a stunning gown for the maid-of-honor.  All the girls looked amazing in their own dress selections. I love the look of dresses that are coordinated, but not matching.
John Robert Woods Photography
Beautiful . . .
John Robert Woods Photography
One of the reasons the rusty color worked for the sash was because we were using vintage amber-colored bottles as part of the table decorations. We also used pinecones, feathers and pods that brought the color to the tables. And, of course, the sash already had a rusty-slightly brownish-green color velvet sash. Haha, I can't think of a better way to describe the color of that ribbon, even if it is not very designer-like of me.

The Sweetheart Table
John Robert Woods Photography

Thursday, November 15, 2012

Lace Trimmed Bar Towels

With only a few weeks to go before the woodsy winter wedding takes place, I keep dreaming up more to do; more ideas for crafting, more ideas for adding interest, more of everything for the entire event. I really need to stop and realize there is "enough already" and that I can relax until it is time to put it all together for the big night. But, I won't. I know myself pretty well . . . and I won't be able to stop thinking, dreaming, eating, and sleeping this wedding until it has happened.
some of my collection of lace trim
One of my most recent add-ons was to embellish the bar towels with lace trims. I found great tubs in gold and silver with a faux bois finish (faux bois is the French term for "false wood") for putting the drinks on ice. I knew a bar towel through the handle would be a nice touch for drying off the bottles when wet. Could not leave it at that. So, I added lace trims to each towel to jazz them up. It is such a good way to use bits and pieces of lace trim, which I have been collecting for years. (And, recently my cousin Joanne and I found a huge bunch of trim at a garage sale and scooped it up for our projects. More on the adorable headbands we're making for little girls next time!)


The finished products. Not only will they be fun for the wedding, but for using afterwards as well. Just a couple of these added to your bathroom towels will dress the room up.
 We'll have several bar and drink stations at the wedding, so I made plenty to go around. 

Finding the right towels to trim was the tricky part. If I had more time I would've scoured thrift stores for good linen towels to use, but I had to buy them new since time is in short supply. I like to wash linens before using (and I do believe towels dry better when washed first) and some of the cheaper towels shrank, so I was out looking again. In a perfect world, all the trim would have been preshrunk as well, but it wasn't. The towels I ended up using ranged in price from an inexpensive Target variety, to pricey (and beautiful) towels from Williams-Sonoma.

The wedding has so many hand-crafted details, I just hope to remember to get a photo of everything on the big day.